
| 일 | 월 | 화 | 수 | 목 | 금 | 토 |
|---|---|---|---|---|---|---|
| 1 | 2 | 3 | 4 | 5 | 6 | 7 |
| 8 | 9 | 10 | 11 | 12 | 13 | 14 |
| 15 | 16 | 17 | 18 | 19 | 20 | 21 |
| 22 | 23 | 24 | 25 | 26 | 27 | 28 |
| 29 | 30 |
- catalina log
- mybatis
- Spring
- MySQL
- STS
- oracle between
- template
- 배열스트링
- between date
- log4j profile
- 라즈베리파이
- Spring Boot
- python 개발환경
- Java
- ORACLE CLOUD
- springboot
- bitbucket
- datasource
- hikari
- git
- between 날짜
- hikaricp
- oracle
- intellij
- Linux
- Spring Security
- Gradle
- ubuntu
- log4j2
- github
- Today
- Total
파워노트
[ skeleton ] springboot 프로젝트 - mybatis 본문
mybatis 설정을 해보자
* datasource 를 설정을 해보았다.
이제는 springboot 에서 쿼리를 쉽게 사용하기 위해 매핑 및 설정을 해주자.
2021.08.10 - [spring boot] - [ skeleton ] springboot 프로젝트 - hikariCP 설정
[ skeleton ] springboot 프로젝트 - hikariCP 설정
[ skeleton ] springboot 프로젝트 - mysql 연동 mysql 연동하는 프로젝트 설정. 데이터 처리 적용. hikari 설정. 자주 마주치는 오류 spring-boot-starter-data-jdbc, spring-boot-starter-data-jpa 와 같은 의..
powernote.tistory.com
2021.11.15 - [spring boot] - [ skeleton ] springboot 프로젝트 - hikariCP 설정 ( oracle cloud ATP)
[ skeleton ] springboot 프로젝트 - hikariCP 설정 ( oracle cloud ATP)
[ skeleton ] springboot 프로젝트 - oracle 연동 요즘 핫한 무료로 주는 oracle cloud 의 DB ATP 를 연결해 보자. oracle ATP 또는 ADW 생성 및 접속을 위한 wallet 다운로드는 아래 URL 참고 - https://www.orac..
powernote.tistory.com
설정하기
* build.gradle dependency 설정.
dependencies {
    ..
    implementation 'org.springframework.boot:spring-boot-starter-data-jdbc'
    ..
}
* config/ MyBatisConfig
@Configuration
@MapperScan(basePackages = "com.powernote.skeleton.mapper", sqlSessionTemplateRef = "mySqlSessionTemplate")
public class MyBatisConfig {

    @Bean(name="mysqlSessionFactory")
    public SqlSessionFactory sqlSessionFactory(@Qualifier("myDataSource") DataSource hikariDataSource) throws Exception {
        SqlSessionFactoryBean sqlSessionFactoryBean = new SqlSessionFactoryBean();
        sqlSessionFactoryBean.setDataSource(hikariDataSource);
        sqlSessionFactoryBean.setMapperLocations(new PathMatchingResourcePatternResolver().getResources("classpath:/mapper/*.xml"));

        return sqlSessionFactoryBean.getObject();
    }

    @Bean(name = "mySqlSessionTemplate")
    public SqlSessionTemplate sqlSessionTemplate(@Qualifier("mysqlSessionFactory") SqlSessionFactory sqlSessionFactory) {
        return new SqlSessionTemplate(sqlSessionFactory);
    }

}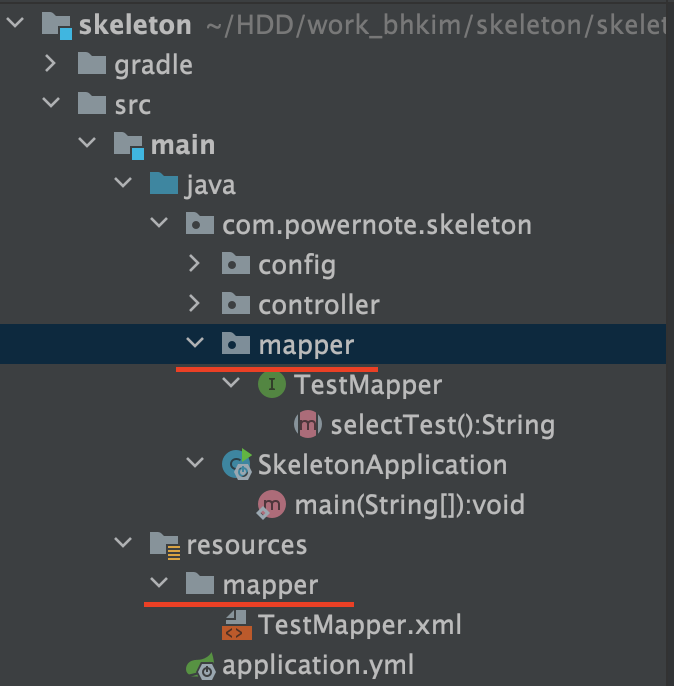
** Mapper Interface Package 를 설정해준다.
@MapperScan(basePackages = "com.powernote.skeleton.mapper", sqlSessionTemplateRef = "mySqlSessionTemplate")
** 실제 쿼리를 작성할 Mapper xml 을 설정한다.
sqlSessionFactoryBean.setMapperLocations(new PathMatchingResourcePatternResolver().getResources("classpath:/mapper/*.xml"));
MapperInterface 및 Mapper 구현
- 우선 설정이 잘됐나를 확인 하기 위해 테스트 쿼리를 작성하여 연결해 보자.
- [ Mapper Interface]
@Mapper public interface TestMapper { String selectTest(); } - [ Mapper xml ]
<?xml version="1.0" encoding="UTF-8" ?> <!DOCTYPE mapper PUBLIC "-//mybatis.org//DTD Mapper 3.0//EN" "mybatis-3-mapper.dtd"> <mapper namespace="com.powernote.skeleton.mapper.TestMapper"> <select id="selectTest" resultType="string"> SELECT 'HelloTest' FROM dual </select> </mapper> - Mapper 는 namesapce를 통해 설정되며 Mapper Interface에서 정의한 메소드인 selectTest() 를 찾아 실행한다.
<mapper namespace="com.powernote.skeleton.mapper.TestMapper"> - gitHub : https://github.com/powerkkim/skeleton/releases/tag/DatasourceSetting_MySql
Release DataSource and Mybatis Setting · powerkkim/skeleton
DataSource : MySql config Mybatis Config
github.com
실행 및 확인
- HelloController ( 테스트 controller ) 생성
@RestController
@RequestMapping("/api")
@Slf4j
public class HelloController {

    @Autowired
    TestMapper testMapper;


    @GetMapping("/")
    public String Hello(){

        String st = testMapper.selectTest();
        System.out.println("$$$$$$$$$$$$" + st);
        return "Hello";
    }
}- 실행. : 실행하고 나면 해당 쿼리를 수행하고 난 결과를 확인 할 수 있다.

마무리
- Datasource 는 Mybatis, Oracle 등등 다양하므로 config 및 application.yml, 등의 설정등에 대한 이해를 해야 한다.
'spring boot' 카테고리의 다른 글
| [ skeleton ] thymeleaf 페이지수정시 재시작없이 리로딩 ( Local 작업시 설정. ) (0) | 2021.11.17 |
|---|---|
| [ skeleton ] thymeleaf 설정 (0) | 2021.11.16 |
| [ skeleton ] springboot 프로젝트 - hikariCP 설정 ( oracle cloud ATP) (0) | 2021.11.15 |
| jdbc pool 이란? - feature hikariCP (0) | 2021.08.10 |
| [ skeleton ] springboot 프로젝트 - hikariCP 설정 (1) | 2021.08.10 |

